DIY Quick Fixes For Your Busted Letus Hawk
For $400, ( Ok, B&H has them on special for $349 ) none of what I’m going to reveal next should be needed. The repairs I’ve done and problems I’ve had are to be expected from something at maybe 1/3 of the price where you can say ” well it was cheap, and the fix wasn’t bad, some I’m ok with it.”
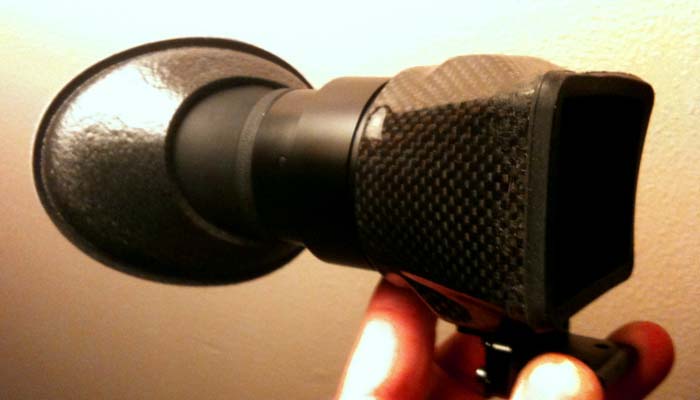
When I first got the Letus Hawk LCD Viewfinder Loupe, the mounting holes stripped out. The inserts in the very sexy carbon fibre body are soft steel. My next replacement had ok inserts, but some weird blob, probably fungus developed on the inside of the lens. Ok, third time is a charm, right ? Well yes, for a while.
After a bit of use, the hex screws came loose. I tightened them, and one of them stripped out again. This time, I just wasn’t in the mood to exchange the unit again, even if it is covered under warranty. Instead I realized that since the bracket design was flawed, I needed to come up with a better idea. The fix was very simple, epoxy. Given that the body is carbon fibre, its made of either polyester or epoxy resin. Epoxy will stick to either very well, and I had some good quality epoxy that dried glossy black.
First I cleaned up the hood body by wiping it off with paint thinner, and letting that completely evaporate. Next I actually glued the rubber gasket on using ACC ( crazy glue ) by running the glue around the inside of the rubber bumper. I slipped the bumper onto the loupe body and this just isn’t going anywhere.
Next in the area where the metal bracket meets the loupe body, I sanded that area a bit to improve the bonding area.
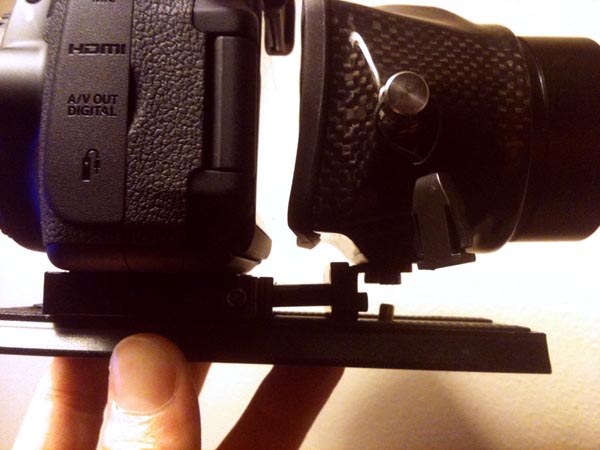
I slid the loupe bracket into its socket on the camera, and made sure it was sitting the way its supposed to, and then placed the loupe itself on the LCD screen in proper alignment.
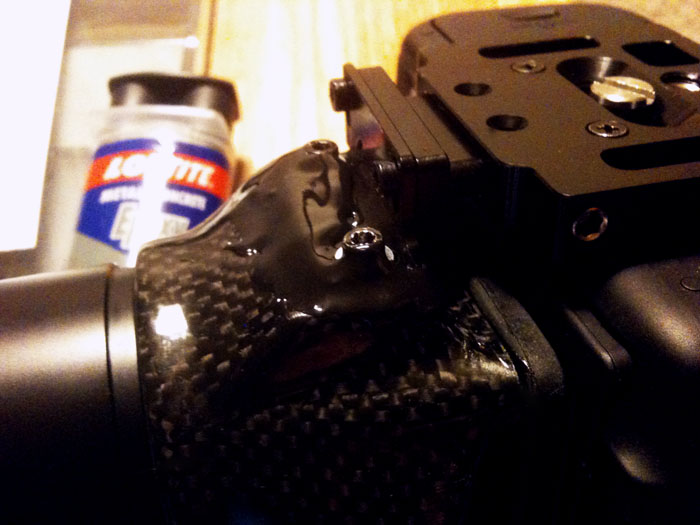
Finally I mixed up the epoxy, about a teaspoon’s worth, and applied on the area where the bracket mounts to the loupe body. The epoxy I had was very thick, and I applied a pretty small amount to just cover the immediate bonding area. Since I was working above the actual camera LCD screen I was being super careful about not dripping or squeezing out any epoxy onto the screen surface.
I then screwed in the two screws, each with some epoxy on their shafts. Even though one was stripped out, it still gave me some grab, and the steel pin glued in place doesn’t hurt anything.
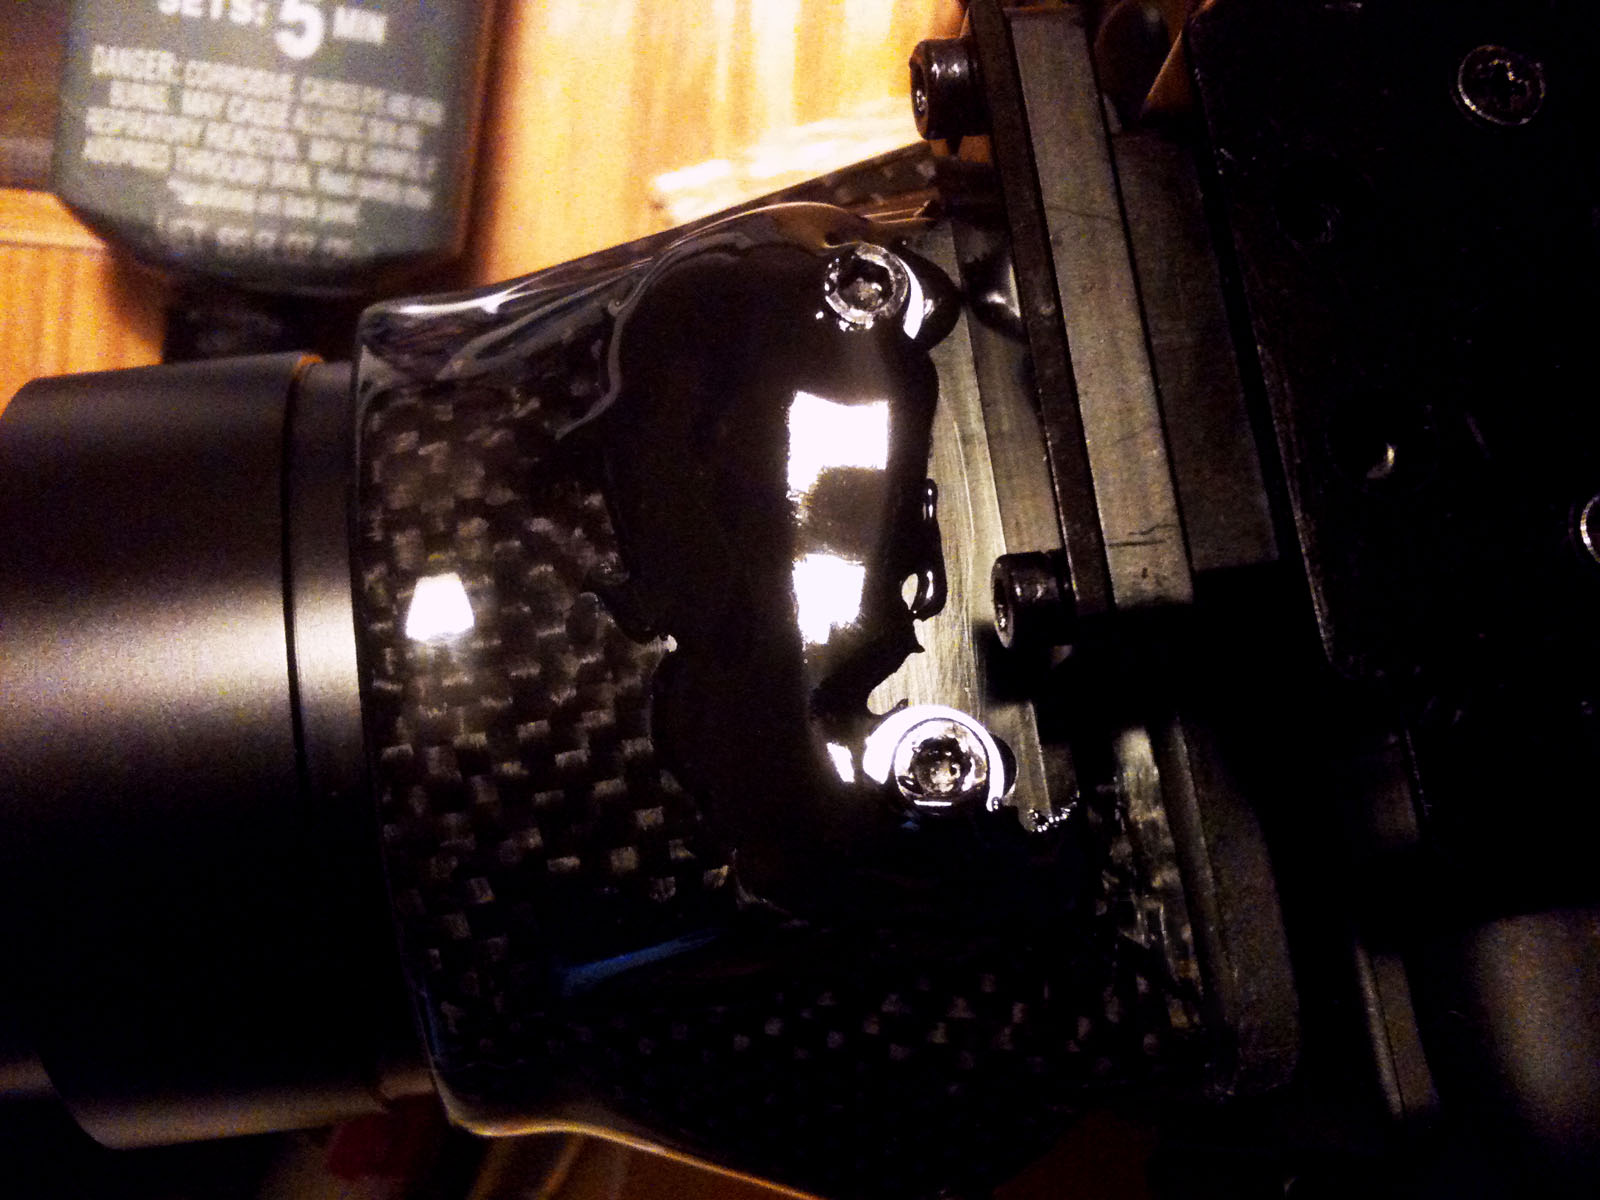
With the remaining epoxy, I globbed it on and around the metal bracket and out onto the loupe body for additional bonding area. I also got epoxy into the screw slots in the bracket to again help with getting the best bond I could. Epoxy does have body strength and I was just taking advantage of it.
I let it dry over night, and so far, so good. It looks like I’ll now have a solid dependable connection that isn’t letting go all the time. Sure its hard to design small reliable brackets likes this, but this is old ground in engineering. The answer is simple : hardened steel or stainless steel, not the cheap soft steel screws and inserts that are currently used. Also, if you haven’t yet stripped out your screws ( it takes 2-3 adjustments to do so in my experience ) you can add a #4 washer ( read really small ) between the screw and the bracket. This will stop the bracket from moving away from the camera when you tighten it the one or two times that you can.
So my word to Letus is : get some hardened stainless steel bolts and inserts, or just change the mount completely… please ! the great optics deserve a better mounting system.